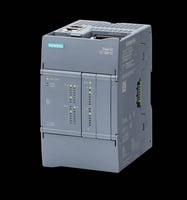
Specifying the new Siemens S7-1200 G2 and need to put together a bill of materials? The TIA Selection Tool is the fastest way to get there. Here's what our product specialists have seen work including a few G2-specific things worth knowing before you start.
Step 1: Use the Cloud Version (this part matters)
The TIA Selection Tool has two versions — cloud and offline. For the G2, you must use the cloud version. The offline tool shows the G2 in the catalog, but trying to configure it there forces a full project migration to the cloud anyway.
Siemens has indicated it will slowly be dropping support for the offline version so we might as well start migrating for those users who haven’t already.
- Search "TIA Selection Tool" and select TIA Selection Tool Cloud
- Combining G2 hardware with an S7-1500, ET 200SP, or other families? Start in the cloud from the beginning
- The interface looks slightly different from the offline version, but the overall workflow is the same
Step 2: Set Up your Project
Once loaded, the tool auto-creates a new project. Navigate to Controllers, select the S7-1200 G2, and you'll land on the properties page.
- Choose Standard or Failsafe application - this determines which CPU's are available
- Safety processors are available for the G2; safety I/O modules are still pending release - verify current availability with your account manager
Step 3: Add Your CPU
Click Add Module and select your CPU — for example, the CPU 1214 DC/DC/DC. The tool will walk you through the options.
- Select failsafe CPU variants (1212F, 1214F) if you're running a safety application
Step 4: Add I/O and Communication Modules
Click Add Module for each module type. The tool enforces placement rules automatically and flags errors before they become ordering problems.
- All G2 I/O modules mount to the right of the CPU
- Communication modules must be placed directly adjacent to the CPU - the tool will flag this if out of position
- Currently available comm module: RS232/RS485 - additional modules are in development
Step 5: Add a Power Supply
In the project tree, add a power supply as a separate line item. Use the built-in filter to narrow by phase and voltage.
- Filter by single-phase, 24V DC (or your required spec) to find compatible units
- The PSU 4200 is a solid compact option for single-phase 24V DC applications
- After selecting your unit, make sure to click Apply - easy step to miss
Step 6: Export your Order List
When your configuration is complete, go to the Order List tab and export. Excel is the most practical format for sharing with your account manager.
- Export formats: Excel (recommended), PDF, or CSV
- Save your project via the settings gear - download locally, or export directly to TIA Portal or ECAD
- A Siemens ID (IMAL) login lets you save projects to the cloud and access them from any browser
Check out our video here to see how to create the purchase list.