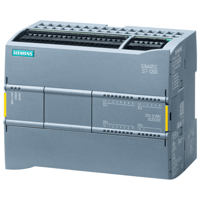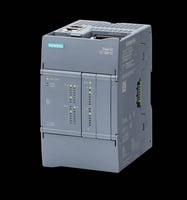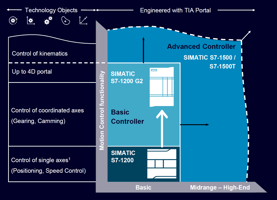
Siemens has revolutionized its automation offering with the new SIMATIC S7-1200 G2 controller,...

The New Way to Wire Your Controller
If you're new to industrial automation or have been working with older PLC systems, you'll be pleased to discover that the new Siemens S7-1200 G2 controller features push-in technology that makes wiring significantly easier than traditional screw terminals.
What is Push-In Wiring?
Push-in wiring is exactly what it sounds like - a connection technology where you can simply push the wire into a terminal to create a secure electrical connection. No more tightening screws and worrying if they're too loose or too tight!
Why You'll Love Push-In Wiring
- Time-saving: Up to 50% faster than traditional screw terminal wiring
- Tool-free for most connections: Just push the wire in and you're done
- Secure connections: Spring-loaded mechanism creates consistent pressure
- Vibration-resistant: Connections stay tight even in environments with vibration
What You'll Need
- Wire stripping tool
- Wires (solid or stranded) sized from:
- 0.2 mm² to 1.5 mm² (24 AWG to 16 AWG) for CPU and module connections
- 0.2 mm² to 0.8 mm² (24 AWG to 18 AWG) for signal board connections
- Small flathead screwdriver for wire removal or stranded wire insertion
- Copper ferrules for stranded wire (recommended but optional)
- Crimping tool if using ferrules
Step-by-Step Wiring Guide
Preparation
1. Safety first! Always ensure power is disconnected from your S7-1200 G2 and all connected equipment.
2. Remove the terminal block by pressing the release levers or applying firm pressure as shown in your device instructions.
3. Strip your wire to the correct length:
- 9-10 mm for CPU and module terminals
- 7 mm for signal board terminals
For Stranded Wire (Recommended Approach)
1. Add a ferrule to the stripped end of stranded wire for best results.
2. Crimp the ferrule using a crimping tool to secure it to the wire.
Inserting Wires

Using Solid Wire or Ferrule-Tipped Stranded Wire:
Simply push the wire directly into the terminal - no tools needed! The spring mechanism will hold the it securely in place. Remember to perform a pull test after wires are inserted into terminals.

For Stranded Wire Without Ferrules:
1. Press down on the spring release using a small flathead screwdriver.
2. Insert the wire while holding the spring open.
3. Release the spring to secure the wire.
After inserting each wire, give it a gentle tug to ensure it's securely held in place.
Removing Wires When Needed
1. Ensure all power is disconnected.
2. Use a small flathead screwdriver to press down on the spring release.
3. While holding the spring down, pull the wire out of the terminal.
Pro Tips
- Color coding your wires makes troubleshooting much easier later
- Use ferrules with stranded wire whenever possible for the most reliable connections
- You can connect up to two wires in a single terminal using a double ferrule (total cross-section should not exceed 1.5 mm²)
- Label your wires before installation - you'll thank yourself later!
Common Questions
Can I reuse terminals multiple times?
Yes! The spring-loaded mechanism is designed for multiple insertion/removal cycles.
What if I don't have ferrules?
While ferrules are recommended for stranded wire, you can insert stranded wire directly by using a small screwdriver to hold open the spring mechanism.
How do I know if my connection is secure?
After insertion, gently pull on the wire. If it stays in place, the connection is secure.
With push-in wiring technology, Siemens has made the S7-1200 G2 controller more accessible than ever for users of all technical backgrounds. No more overtightening or under tightening terminal screws - just reliable, consistent connections every time!
Need more help with your Siemens automation project? Contact marketing@eandm.com or browse our free workshops and training sessions at www.eandm.com.